How To Resize Images For Squarespace
Ever wonder what the best image size is for a Squarespace website? I have some clients that add RAW photos to their site straight after a photoshoot. If you do this, your site will slow due to the large file size. It is always best to establish a size for your images while designing your website, so when it comes to resizing and optimizing, your website will be in good speed condition.
Tools You’ll Need:
Photoshop
Don’t have Photoshop? Click here to learn how to resize images on Canva (coming soon).
File Types
Save images in .jpg, .gif, or .png format only.
.pdf, .psd, .tff, and .doc files aren’t web-compatible.
Recommended Image Sizes:
Banner Images: 2000×1500
Square: 1500×1500
Vertical: 1500x1800
Horizontal: 1500×1100
Steps:
Choose an image.
Drag it to Photoshop.
Make sure to unlock your image by clicking on the lock symbol on the layer.
4. Confirm your ruler is at Pixels by right-clicking on the top ruler and clicking “pixels” (Command + R to get ruler).
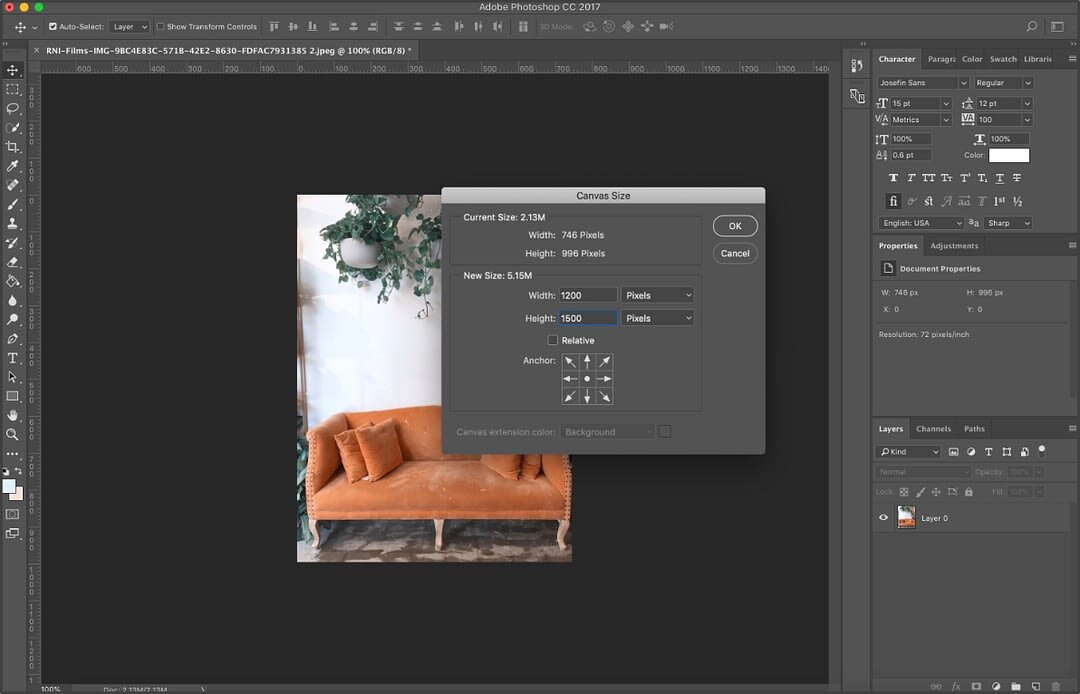
5. Command + Option + C to resize the Canvas to 1200px (W) and 1500px (H). Click OK.
6. Command + T to scale down the image into the frame. Make sure to hold Shift while resizing as to not warp your image as shown in the sample above.
7. Command + Option + Shift + S to save image for web as a JPEG. Make sure your image size is less than 400KB (reducing the file size will give you a faster loading speed on your website). To properly optimize your images, lower the quality down to a number that doesn’t blur your image (compare the before/after screenshots below).
8. Click “Done”, and pick the right file name for your image. Now your image is properly sized and optimized for your website.


